

May is Creative Beginnings Month and up until a few days ago I hadn’t taken advantage of that by starting any new projects. There always seemed to be something more pressing; like cleaning out the guest bedroom for my mother-in-law’s pending visit this Memorial Day weekend. She’s actually coming to attend our son’s high school graduation next week. We’re so proud of him but I’ll refrain from bragging. She made certain she would be here for his graduation because she wasn’t able to make it to our daughter’s graduation two years ago. She also made us very proud.
Anyway, as mother-in-laws go, they ALWAYS inspect every room in the house so we had to organize our bedroom as well. Thinking about it now, her visit was the perfect excuse to get a little creative while organizing at the same time.
First I should say that our bedroom didn’t come with a closet because it was supposed to be a sitting room. An attached garage was converted for that purpose before we moved in but it’s size and location felt more like a master bedroom to us.
After we moved in my husband installed two doors side by side that lead to the utility room. The plan was to divide the utility area and convert it into his and hers walk in closets. He manged to build his side, the smaller of the two, but ran into issues with my side. I believe he said something about having to redo some plumbing and moving the water heater. Long story short, I have no idea when I’ll get my walk-in closet.
In the meantime, I’ve kept most of my things in storage bins and at one point tried using a rolling clothes rack.  It worked for a while but eventually broke down. Then I got a wooden wardrobe.
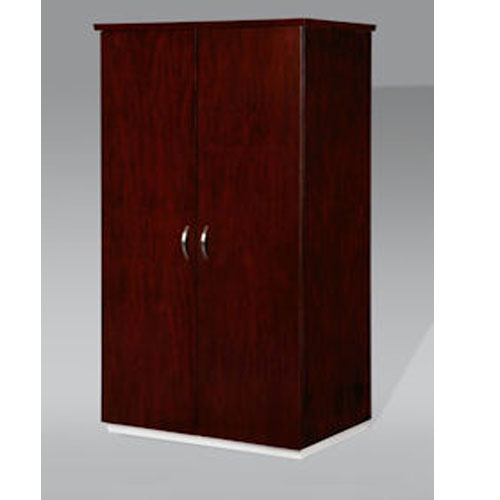 I love it but I stuffed it until the back started to detach and bow out. Nothing a few tap nails couldn’t fix.
 Still, it was smaller than the rolling rack and I had to keep using my big blue bins. For a long time I’ve been desperate to ditch the bulky storage containers. I hated stacking and un-stacking them to get to my things. So when crunch time came there was no way around it. I had to part with a ton of stuff and figure out how to neatly organize what I wanted to keep; all without spending a dime. Well less than $15. I decided to hang rows of chain links on the wall and hang my wardrobe out in the open.
I made the graphic below (after my project) to give you an idea of my layout and the problem I ran into.

What I used and what I did:
- 2 five-foot chains. Actually one 10-foot tie-out chain (meant for tethering dogs in the yard). I purchased something similar to the one below a few years ago from Dollar Tree. Since we never put it to use I snipped it in half for my makeshift closet.

- 4 four-foot chains. I checked all the Dollar Trees in town and couldn’t find anymore tie-out chains. So I headed to Lowe’s where they cut chain by the foot. I think that I paid around 60 cents per foot. You may want all of your chains to be the same length. But if they don’t differ by much you can hang them at the same height and the extra length will be hidden by your clothes. Or you may choose to intentionally stagger your lengths.

I should warn you that while my “closet” is acceptable, it’s not the best. If you can’t tell, I was trying not to spend any real money so I cut corners when I could. Besides the tie-out chain, I already had on hand:
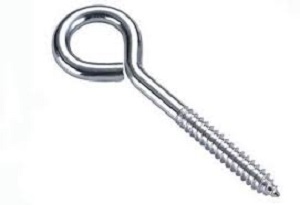
- 1 eye-bolt screw

- 1 long thick nail with a wide head (it’s probably 4 inches and I left at least an inch and a half protruding)

- I bought 4 self screwing hooks for the 4 new sections of chain.


Each end of the tie-out chain had a snap hook so when I snipped it in two all I had to do was attach one to the eye bolt and hang the other on the nail.

To disguise all the different fasteners I hung scarves on the hooks and nail and wrapped one around the eye-bolt.
Tips:
- Get the chain length and thickness that’s right for your project and your taste.
- Hang your chains high enough that your clothes are not touching the floor. Even higher if you plan to line shoes and boots underneath. You don’t want to have to sweep your clothes out of the way to get to your footwear.
- Don’t hang chains too high. And don’t hang clothes too high up the chains that you can’t comfortably reach them. Unless you have a step stool or can stand on the bed to get to them, you’ll only make a mess trying to snatch stuff off the hangers and make yourself frustrated in the process.
- Don’t hang chains too close. If the chains are too close then your rows of clothing will overlap making it difficult to breeze through your wardrobe.
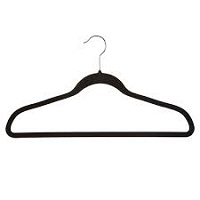
- Use hangers with wire hooks. There’s a better chance they will fit whatever size chains links you buy. Plastic hangers were too big for the chains I got. I could force them in but then I couldn’t get them out without breaking some. I replaced any plastic hangers I had with a plastic/wire combo. I got a ton of them for free at a second hand shop.

- Use no slip hangers. When you look through your clothes they won’t slide off the hangers. I happen to have only one no slip hanger and I love it. They are now on my wish list.

- Affix your hooks to studs. If you don’t have a stud finder, use a hammer to tap along the walls. When you reach a stud it will sound and feel more solid. Studs are sturdy enough to handle the weight of your makeshift closet space. If the space you chose doesn’t have any studs consider mounting a 2×4 stud or other study piece of wood horizontally at the height you want to start your chain links. Affix your hooks to the wood.

- Make sure your chains, hooks and hangers can handle the weight of the clothes.

Pros:
- Quick and easy install
- Easily view and access your entire wardrobe
Cons:
- Holes in the walls. (Remedy- nail hole filler and touch up paint.)
- If not properly spaced, it can be more hassle than help.
Other neat tips:
With all the extra space inside my wardrobe I was able to hang purses, bras and a few other thing. I used skirt/pant hangers to clip my bras two at a time and hang. Have you tried any of these ideas?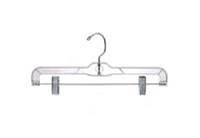
Share your open closet or closet-free storage tips in the comments section or tag us on Pinterest to show us.

